How To Embed a Timeline on Your Website
Embedding a timeline on your website is a great way to increase engagement with your readers. You can tell your readers chronologically and visually what happened over time. Our data shows that the time spent on site increases when a timeline has been added to your article. In this blog post, we will explain how to embed a timeline in your website, blog post, or news article in 4 simple steps.

Frido van Driem
Product manager
Native Embedding Support on most Content Management Systems (CMS)
Adding a Timepath timeline to your website is easy and flexible because it works seamlessly with different content management systems (CMS). To embed the timeline widget, you need custom code. Most content management systems have native embedding support. For example:
Webflow: provides several different ways to add custom code
WordPress: many different page builders and plugins allow you to add custom code
Wix: native embedding support
With Timepath, you don’t have to worry about coding. Just copy and paste a link into your website editor, and voila! Your timeline is embedded and ready to go, showing your events or stories beautifully and interactively. Below are the 4 simple steps to embed a timeline.
The best part? Any changes you make show up instantly (after 5 minutes) on your timeline without you needing to do anything else.
How to Embed a Timeline on Your Website in 5 Steps
It all starts with creating a timeline. Before you know it, you're ready to share it with the world. Now it's time to embed it on your website! You do this by following 5 simple steps:
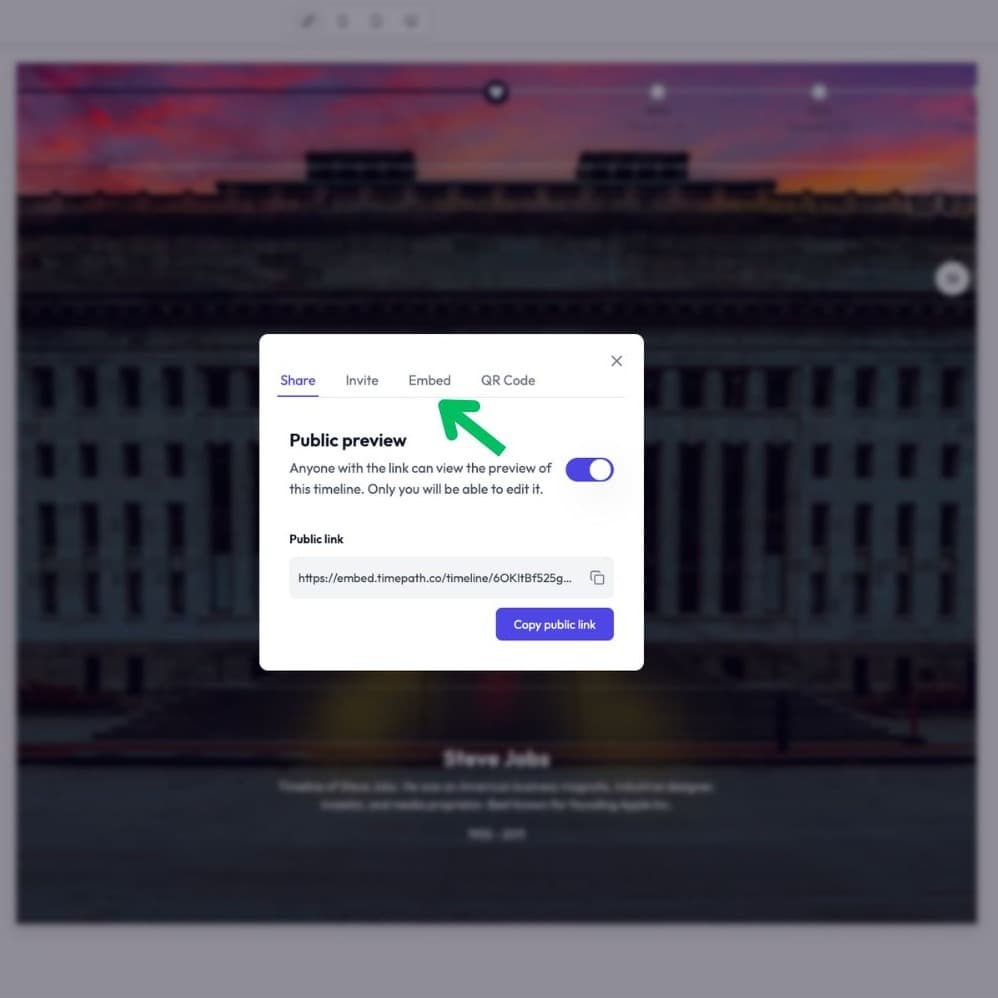
Step 1: Open the Share menu
Open your timeline in the editor and click the ‘Share’ button in the top-right corner. Then go to the ‘Embed’ tab.
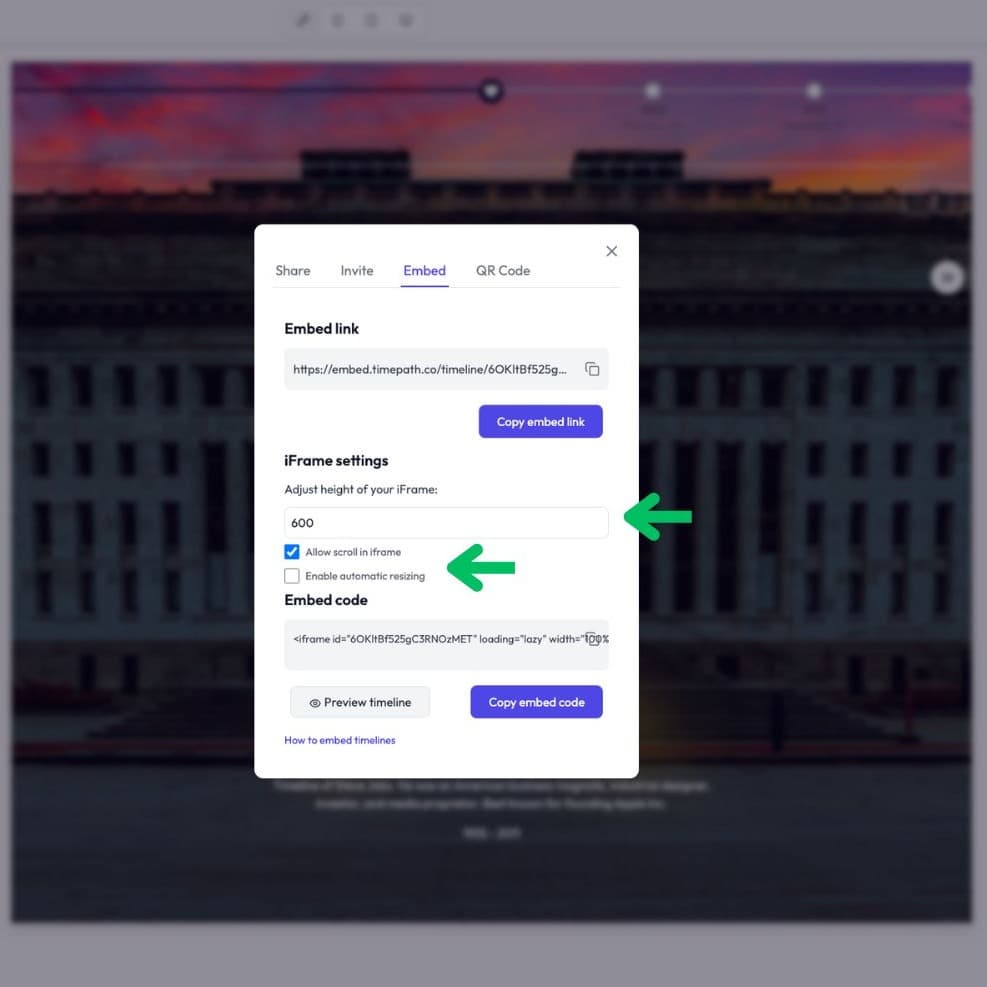
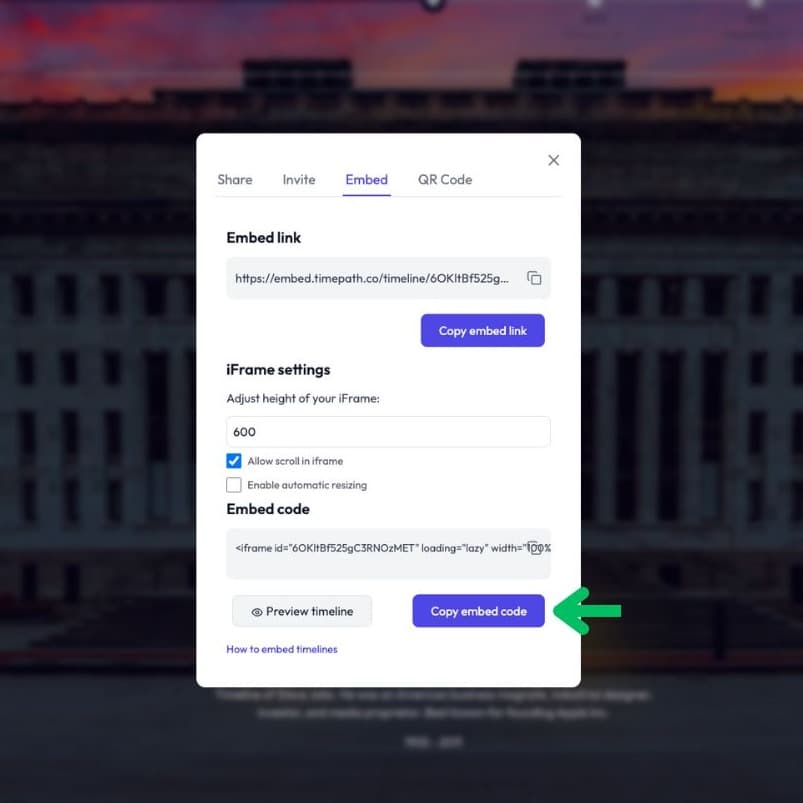
Step 2: Adjust the embed settings
In this menu, you can customize how the embedded timeline will appear. You can set the height of the timeline frame on your page by entering a value in pixels. There is also an option to allow scroll within the iframe, which is useful if your timeline contains many events or longer content. Finally, you can enable automatic resizing. This ensures that the timeline adjusts to different screen sizes, such as phones or tablets, so it always looks good for your visitors.
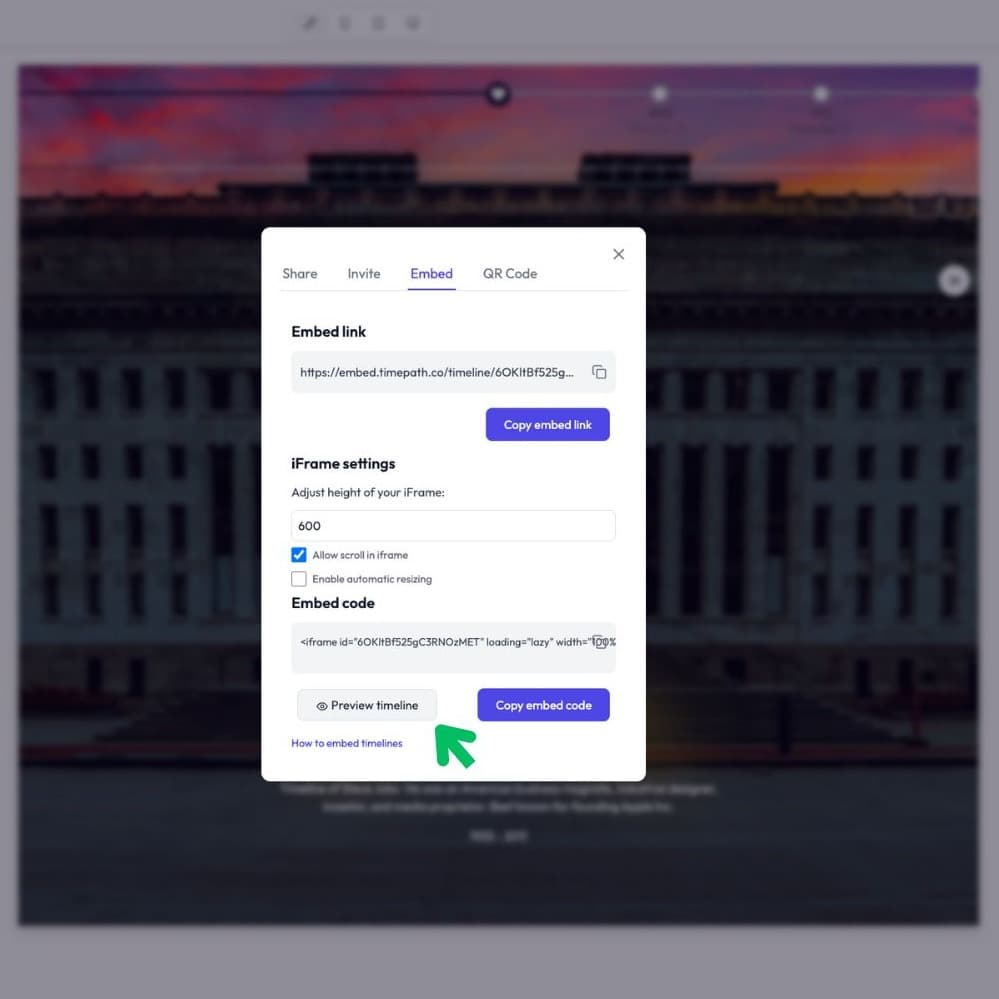
Step 3: Preview timeline
You can use the ‘Preview timeline’ button to check how your timeline will look before embedding. Once it’s added to your site, visitors will see the interactive timeline exactly where you placed it.
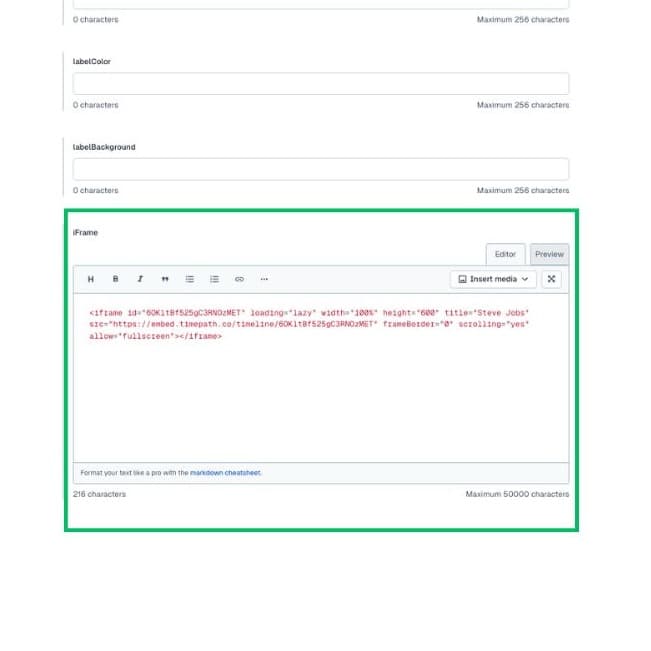
Step 4: Copy the embed code
Below the settings, you’ll see the HTML embed code. Click ‘Copy embed code’ to copy it to your clipboard.
Step 5: Paste the code into your website
Go to your website builder or CMS (such as WordPress, Contentful, or Webflow) and paste the code into an embed block or custom HTML section—wherever you want the timeline to appear.