How to Create a Timeline with Timepath
Are you a blogger, content marketer, journalist, or student eager to learn how to make an online timeline of events? Your story truly comes to life when presented in the right format. With Timepath, you can create interactive timelines within minutes, keeping your audience on the edge of their seats. Explore our easy-to-use templates and effortlessly embed your timeline on your website and in your news articles. In this article, we’ll explain what a timeline is and guide you on how to create a visual timeline in 5 simple steps using Timepath.
Frido van Driem
Product manager
What is a Timeline?
An online timeline is a visual representation of events in chronological order. It provides an overview of a subject's history, such as a company's (brand) history, historical events, or a person's life. By creating a historical timeline, you present important events in an interactive, clear, and visually appealing manner. Read more about creating timelines for education and for publishers.
What Is Timepath?
Timepath is the ultimate tool for effortlessly creating stunning online timelines without the need for programming language. Utilize various templates, customize the timeline to match your style, and easily embed it on your website and in news articles. Within a few clicks, you'll have your first digital timeline ready.
Adjust the colors and fonts to align with the rest of the content, and import posts, videos, tweets, and images into your timeline if desired. The possibilities are endless. Creating a timeline with Timepath improves engagement, makes your message more enjoyable to receive, and also ensures that it sticks better.
Learn more about the capabilities of our free timeline maker.
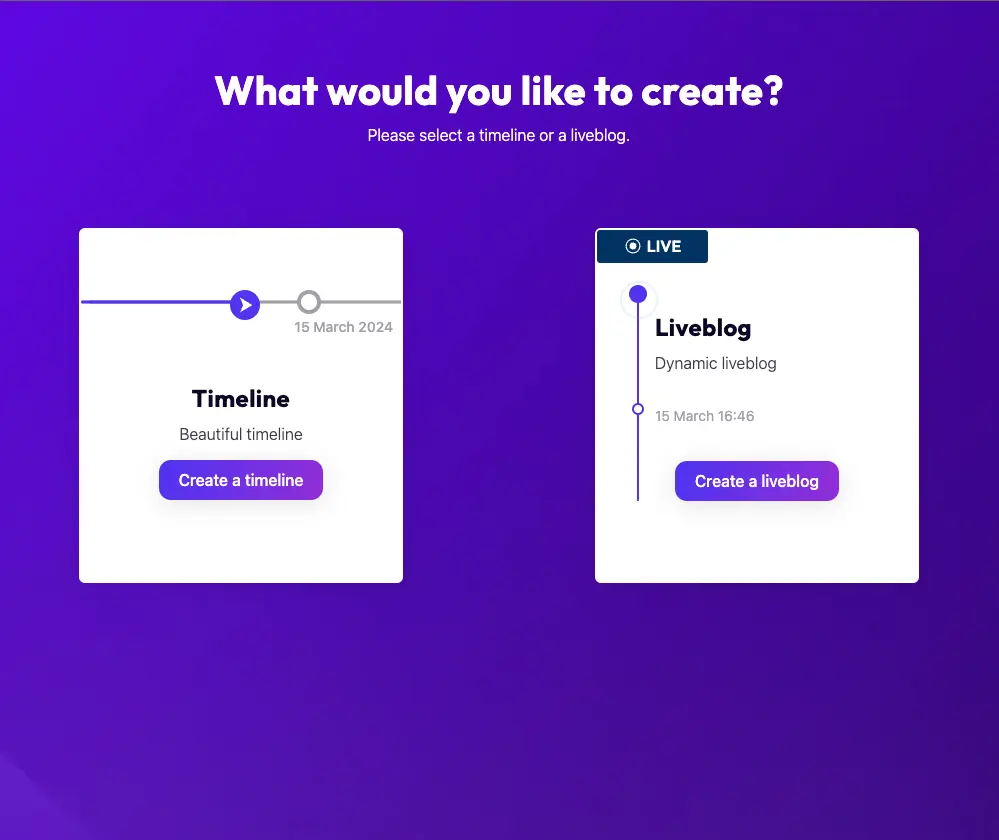
How to Make a Visual Timeline in 5 Steps
Step 2: Add Events to Your Timeline
Log in to your Timepath account and click on your project. You'll see a navbar on the left. This is where you'll find the Overview tab, which gives a general overview of your timeline. This is also where you can add new timeline events. Start adding events to your timeline by clicking on ‘add event’. This is where the magic happens! Come up with a short, catchy title for the event. Choose the date of the beginning of your timeline and start writing. Let your creativity flow and choose from a wide range of multimedia that you can add with just one click.

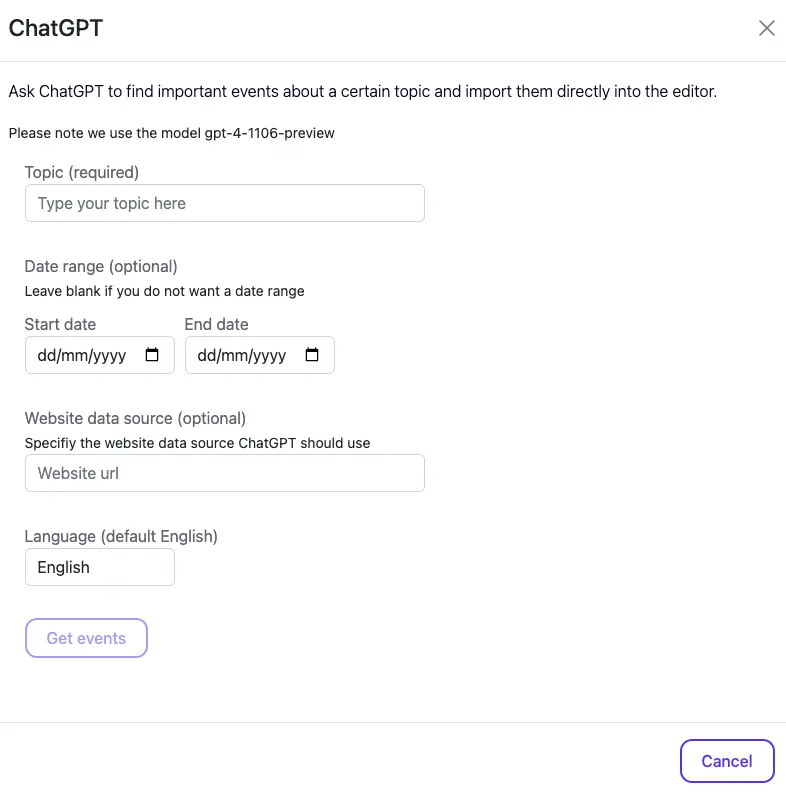
Step 3: Let ChatGPT Do the Writing for You (optional)
Leverage ChatGPT to retrieve multiple events on a specific topic. Click on the ChatGPT feature in the top bar and provide the subject. If you'd like, choose a date range and a website data source. In the blink of an eye, ChatGPT will generate relevant events for you that you can directly add to your timeline.
Step 4: Bring Your Design to Life
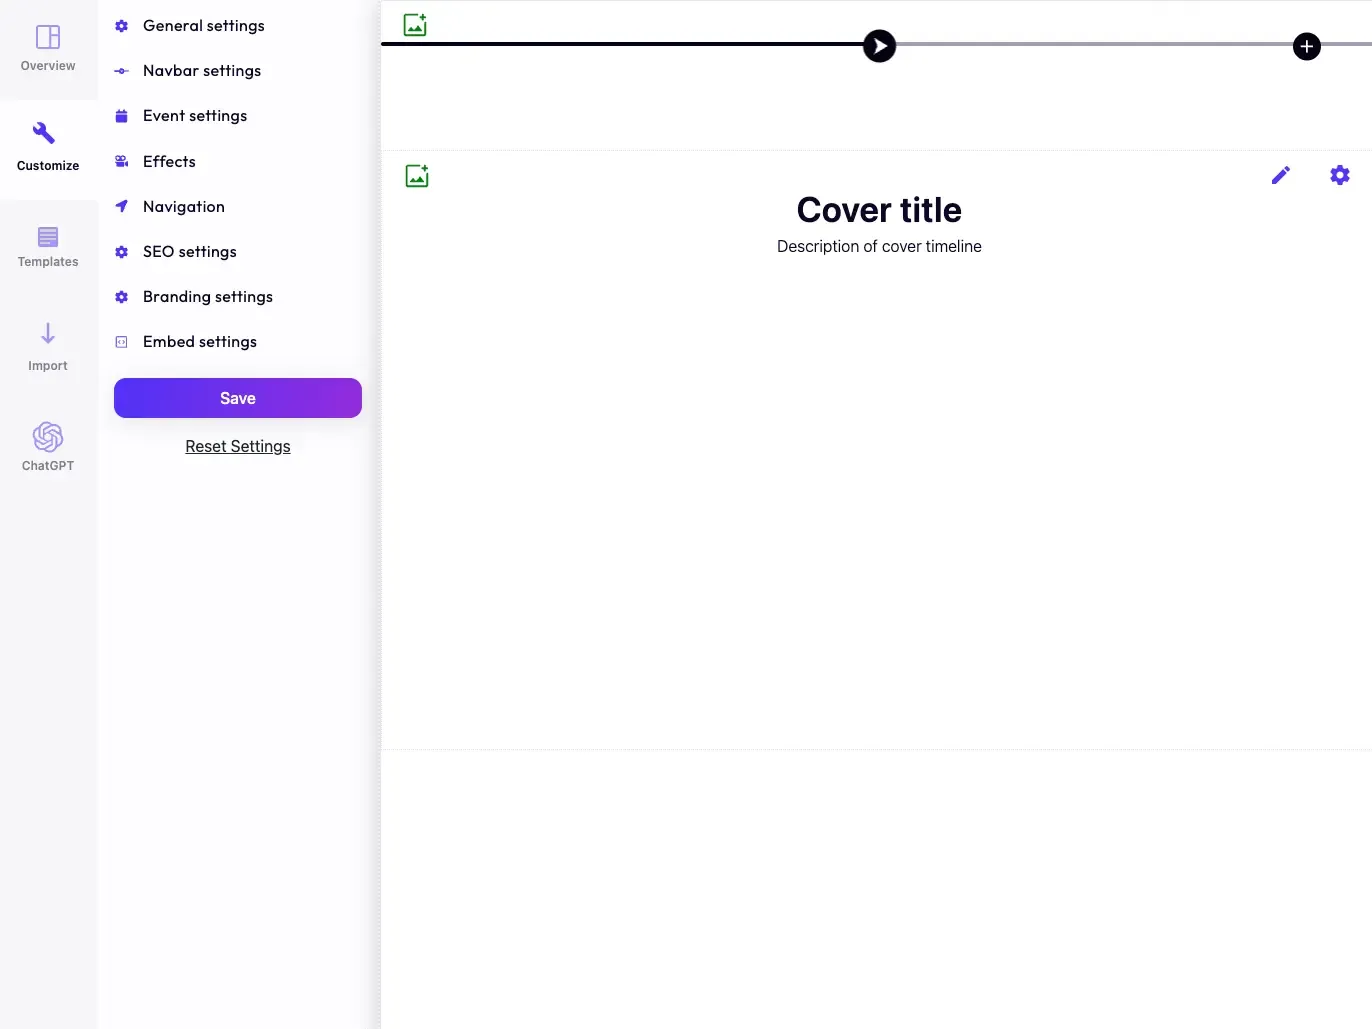
When you’ve added all the events, it's time to personalize your timeline to perfectly match your message and style. Click on the wrench icon in the top left corner. There you can customize fonts, colors, and effects and choose the timeline direction (horizontal or vertical). Also, check out our example timelines for some extra inspiration!
Step 5: Save, Share, and Embed Your Timeline
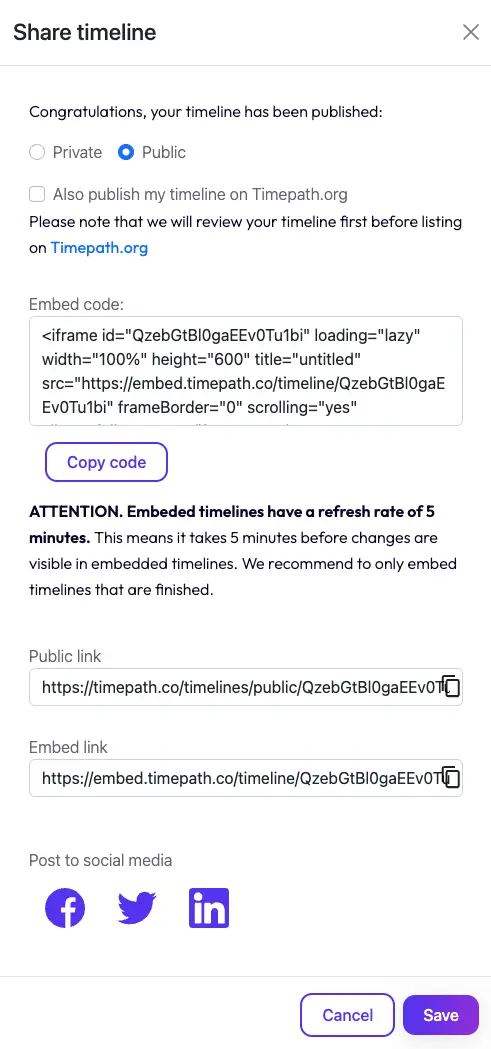
When your timeline template is filled out with all of the necessary information and graphics, hit the ''share'' button. By default, your timeline story is published in private mode. If you wish to publish or embed your timeline story, set your timeline to public. If you choose public mode - congratulations! Your timeline story is now visible to everyone! Spread the word and share directly on your favorite platform. Use the "share link" provided, post directly to Facebook, Twitter, or Linkedin, or copy the provided code and embed it into your website, blog post, or article. Timepath saves your designs, so you can always revisit your project if you need to update it in the future. Come back at any time to modify your timeline. The changes you make will be instantly visible on your website after you save them.